How to Record a Podcast Remotely
By
Sheida Mirjahani
— 11 minutes read
|
Published on
November 13, 2024
Recording a podcast remotely has never been easier, but finding the right tools and knowing how to prepare can make a big difference in sound quality and ease of use.
In this guide, we’ll show you the best ways to capture high-quality audio and video—even if you and your guests are far apart.
At the end, we’ve included a helpful checklist to get you ready for your first episode, covering everything you need for a smooth remote recording session.
Whether you’re new to podcasting or looking to improve your setup, we’ve got you covered!
Pick a Method For Recording Your Podcast Remotely
For recording a remote podcast, you have four main options:
- Use Video Conferencing Software
- Use Remote Podcast Recording Software
- Record Phone Calls Through a Mixer
- Record a Double-Ender
Highly Recommended: Using Remote Podcast Recording Software
For most podcasts—especially those created to build a brand or showcase thought leadership—our top recommendation is remote podcast recording software, as it’s specifically built for high-quality, remote recording.
Our Top Recommendation
Riverside.fm
Our top recommendation is Riverside.fm, which is a no-brainer for remote recording. We have no affiliation here; it’s simply the best option we’ve found. It’s perfect for founders, marketers, and anyone wanting to host a podcast to build a brand.
- Easy Recording Without Hassle
Riverside records high-quality audio and video on each guest’s device, keeping everything in sync and ready to use—no extra steps needed. - Invite Guests with Just a Link, No Downloads
Send a link, and your guest is in. They don’t need to download any software, making it easy for anyone to join without setup problems. - Edit the Podcast Directly Inside the Software
Once recorded, you can edit the podcast right in Riverside. The platform has tools for editing transcripts; you can cut or trim parts by changing the text, eliminating the need for extra editing software. - Live Stream and Publish to All Podcast Apps
Stream your podcast live, then publish it directly to all major podcast platforms with Riverside’s Anchor integration, streamlining the entire process.
Other Remote Podcast Recording Software to Consider
- SquadCast | $12 per month
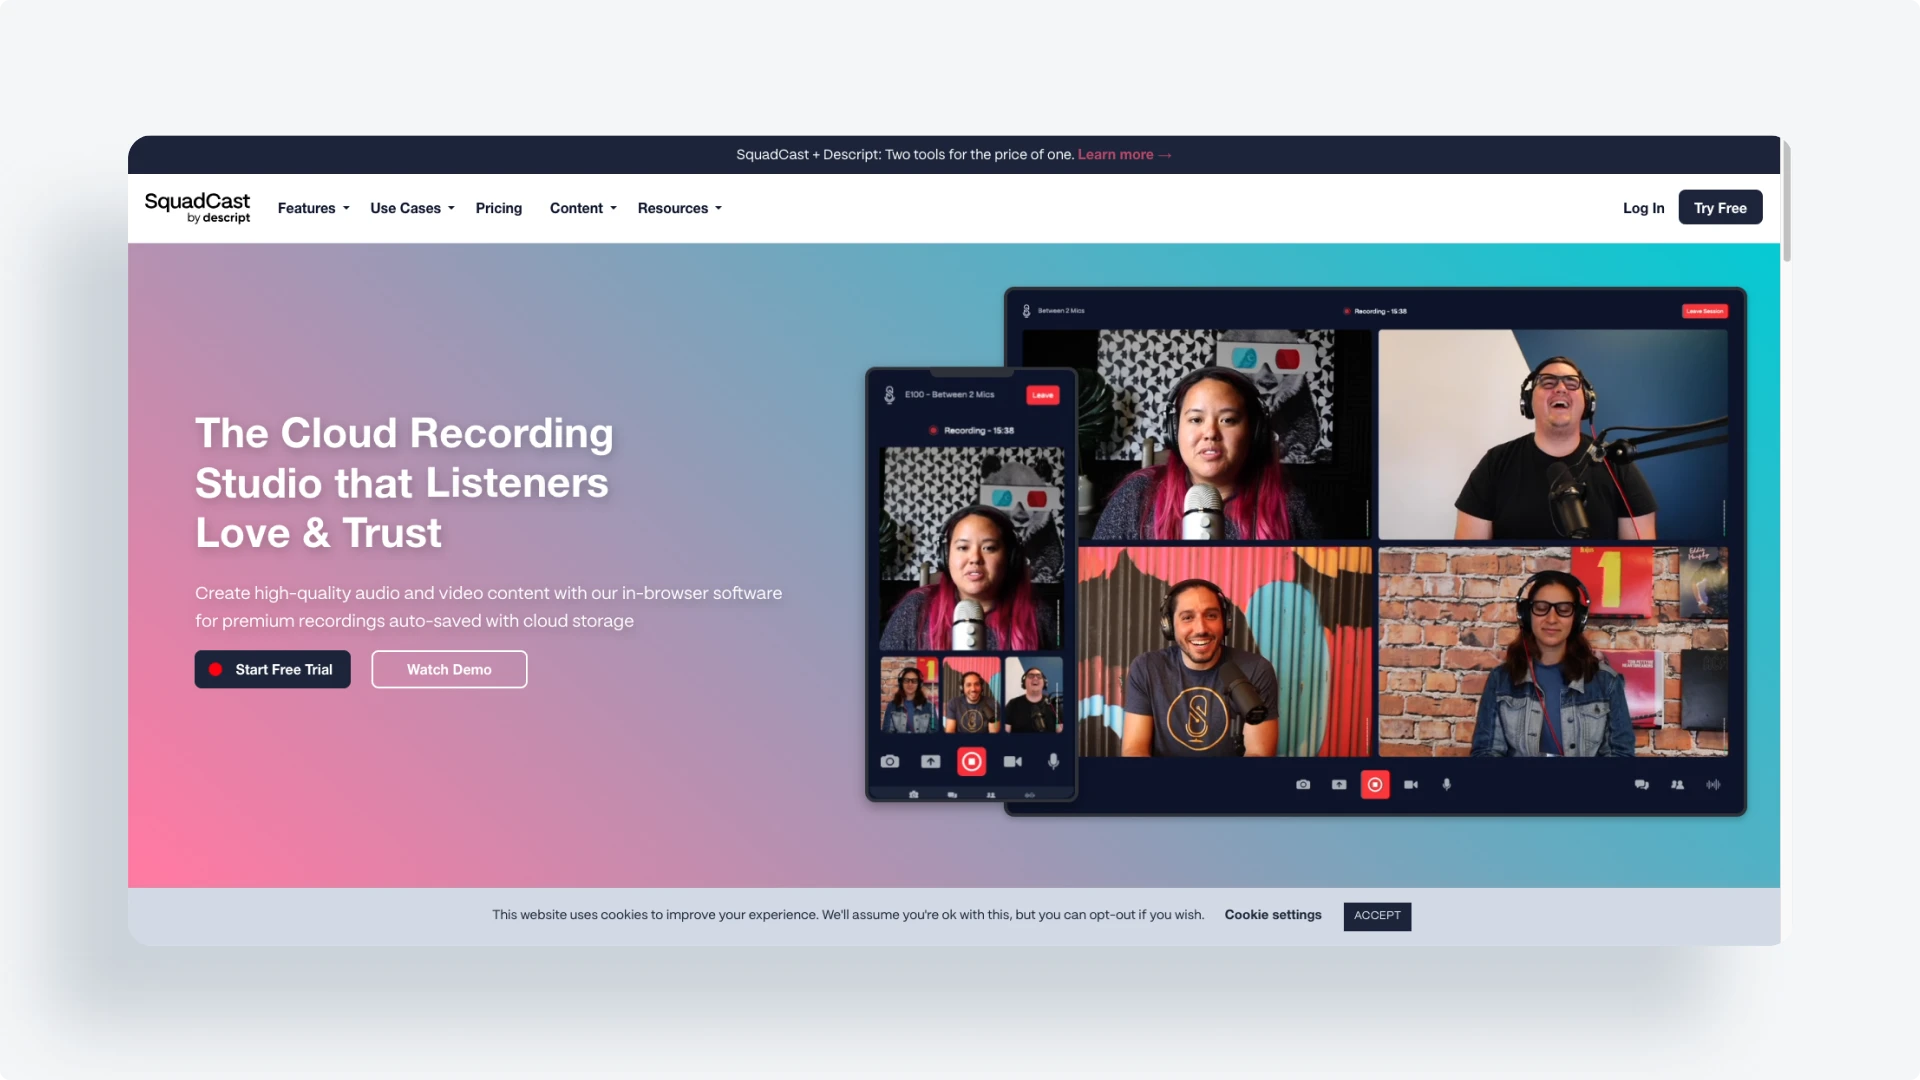
Riverside and SquadCast are top remote podcast recording tools, each with unique strengths.
People know Riverside for its great audio and video quality. It works well even with weak internet. This is possible because it records locally on each participant's device.
It also offers built-in editing, transcriptions, and easy guest invitations with a simple link. Some users report minor video issues, but it’s ideal for video podcasts.
Users praise SquadCast for its excellent audio quality with locally recorded WAV files, supporting up to 10 participants.
It is a bit more complex to set up comparing to Riverside. However, it is popular with podcasters who focus on audio because it provides reliable sound. For video needs, Riverside is often the preferred choice, while SquadCast is a go-to for high-quality audio.
- Other Options:
Your Remote Podcasting Checklist
1. Get a Good Microphone
What to Look for When Choosing a Podcast Microphone
In a recent blog post we had a full guide about how to choose the best microphone for a solo or duo podcast. Picking the right microphone for your podcast can make a significant difference in sound quality. Here’s what you need to know to make the best choice without overcomplicating things.
1. Go for a Dynamic Mic, Not a Condenser
Dynamic mics are ideal for podcasting because they don’t pick up every little noise around you—just your voice. This means less background noise and less time editing. Condenser mics are more sensitive, which is great for music but not for podcasts, as they capture too much background sound.
2. Choose USB Over XLR for Simplicity
USB mics are easy to plug directly into your computer—no extra equipment needed. XLR mics are high quality, but they need a separate audio interface or mixer to function. This can be more expensive and complicated. For most podcasters, a USB mic is the way to go.
Top Mic Picks
- Samson Q2U ($70) - Affordable, USB dynamic mic.
- Blue Yeti ($130) - Popular with settings for different setups.
- Audio-Technica AT2040USB ($149) - High-quality sound, great for podcasting.
2. Wear Headphones to Avoid Echo
Wearing headphones when you record a podcast is a must to avoid echo. Without headphones, your microphone can pick up sound from your computer speakers. This can create an annoying echo or feedback in your recording. Headphones maintain clear audio by ensuring that only your voice gets picked up, so your listeners hear a clean, crisp sound.
What to Look For
Closed-Back Design
- Why It Matters: Closed-back headphones keep your sound sealed in, so it doesn't leak out and get picked up by your mic. They also block out external noises.
- Benefit: You'll avoid annoying echoes and focus better on the conversation.
Comfort Is Key
- Why It Matters: Recording and editing can take a while. Uncomfortable headphones can be a real pain—literally.
- What to Look For: Soft ear pads and a comfy headband. You want them snug but not too tight.
Wired Over Wireless
- Why It Matters: Wired headphones provide a stable connection without any audio delays.
- Benefit: You'll hear everything in real-time, which is crucial when multiple people are talking.
Portability
- Why It Matters: If you're on the move or have a small workspace, lighter or foldable headphones are easier to handle.
- Benefit: Easy to pack up and go wherever you need to record.
Our Top Picks
Budget-Friendly:
- Price: Around $50
- Why They're Great: Affordable and reliable with good sound quality. Comfortable for long sessions.
Mid-Range:
- Price: Around $100
- Why They're Great: Durable and known for clear, balanced sound. A popular choice among podcasters.
Premium
- Price: Around $500
- Why They're Great: Excellent sound quality and super comfortable. Ideal if you're ready to invest a bit more.
Why Headphones Make Recording Easier
Using headphones helps you catch issues as they happen—like background noise or mic problems—so you don't have to fix them later. This saves you time and makes the editing process a lot smoother.
3. Find a Quiet Place to Record
Choose a quiet location to reduce background noise, improving audio quality with less editing.
4. Test Your Equipment Before You Start
Do a quick check of your microphone, headphones, and internet connection to catch any issues early.
5. Clap Before Starting Recording
A clap helps align audio tracks during editing, simplifying post-production.
6. Start Recording and Make a Backup
Hit record and consider recording a backup to avoid losing your content.
Turn Your Podcast into More Content
After editing, make the most of your podcast by repurposing it into other formats. With Flowjin's podcast clip maker tool you can automatically turn your podcast into transcripts, short clips, social media posts, and even memorable quotes. Expand your content without extra effort.
Watch this video to learn how to use Flowjin to make video clips, quotes and social media posts from your podcast with one click.